Davinci Resolve vs Kdenlive
I've used both video editors extensively, and here are a few thoughts on why I'll be sticking to Resolve for the time being

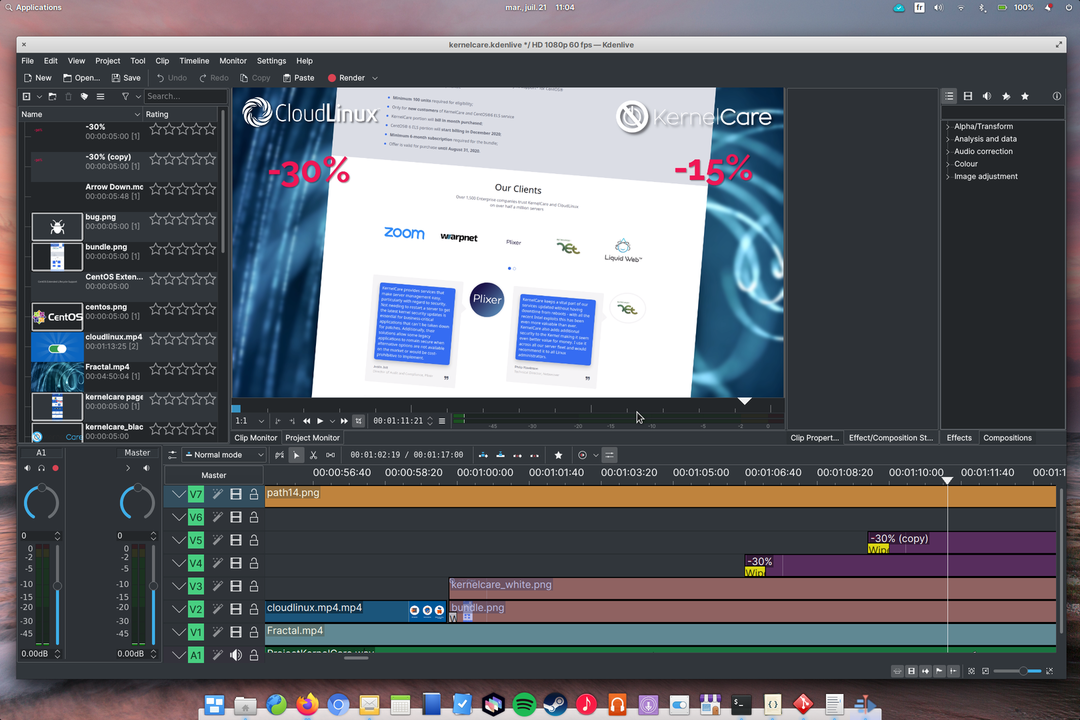
For most of the life of the channel, I’ve used Kdenlive to edit my videos. I started the first few ones with Pitivi, which is great as well, but I wanted to use something that had a bit more possibilities, and try to step up my game. Kdenlive felt right for this. It has a bit of a learning curve, and getting it to run without crashing can be a hassle (hint: use the flatpak version), but it offers a lot. In terms of effects, whether audio or video, in terms of available transitions (through custom wipes), and compositing, and now with a much better tool to handle audio levels, it’s a fantastic open source tool. I liked it so much that I even made a few tutorial videos to show people it’s actually a great piece of software.
Still, after about 2 years, it felt like it was time to try something new. Davinci Resolve was making bedroom eyes at me from the corner of the room, and since I now have an Nvidia GPU, I thought it could be a good time to try my hand at it.
I used it for one full video, and I created many mini projects in it to try and reproduce stuff I could do easily in Kdenlive. Here is my opinion on both tools.
Kdenlive - Awesome, but…

Why did I feel I needed to try something else than Kdenlive? The main reason is performance. Kdenlive is powerful, but it doesn’t use your GPU, at all. Not for previewing your video, not for rendering. It only taxes your CPU, and it makes it really hard to use in some cases. I usually overlay quite a bit of stuff on top of my footage, like images, incrustations, text, or icons, and these things add up in terms of performance. They add up so much, in fact, that the preview becomes virtually unusable when I have 4 to 5 elements at the same time on screen. Even with proxy clips, it’s just not practical to have your video previewing at a few FPS. You’re missing the little details, the timing problems you should correct, and it makes the editing process a bit of a trial and error game.
Second problem: Kdenlive isn’t very extensible. While you can add your own title templates, or image based wipes, you can’t add custom transitions. More mainstream video editors usually have a plugin system that allows users to add dynamic transitions, or 3D or animated titles. Kdenlive doesn’t have such features. Its titling tool is barebones (it handles text or images, and simple title movement, but not specific animation of any object), and while you can create your own transitions and movements using the transform, blur, or rotate effects, you can only save these effects one by one and not the whole effect stack applied to an item, it means you have to use multiple clicks to reproduce an effect you created.
For example, if I want to create my “Linux, Open Source and Privacy News” title that I use in all my News videos, I can save the title itself, with the font sizes, the colors, and the position, but I can’t save the animations for each of the elements, like zooming onto the page, and disappearing afterwards. I have to save each transformation one by one, and re-apply them one by one each time I want to re-use that title.
This is a bit annoying, to be honest, since it makes you lose a ton of time redoing the same things.
The final point, though, is bugs. While I seem to have a pretty stellar experience with Kdenlive compared to other users, I still encounter some bugs. The most annoying, and the one that convinced me to try something else? Rendering my videos created files without any sound for an arbitrary period, going from 10 to 45 seconds. It made me re-render the same video over and over, until I either escaped the bug somehow, or until I had left enough empty space on my tracks that the bug didn’t impact the “real” video audio. I then had to cut out the empty part before uploading. There is also an issue where zooming in and out of the timeline hides clips after you’ve cut them, and the titling tool now uses a weird resolution when trying to preview the background for placing a title, so it makes it impossible to place titles correctly.
All these little issues decided me to go give Resolve a try. And it was… interesting.
Davinci Resolve - that learning curve, tho

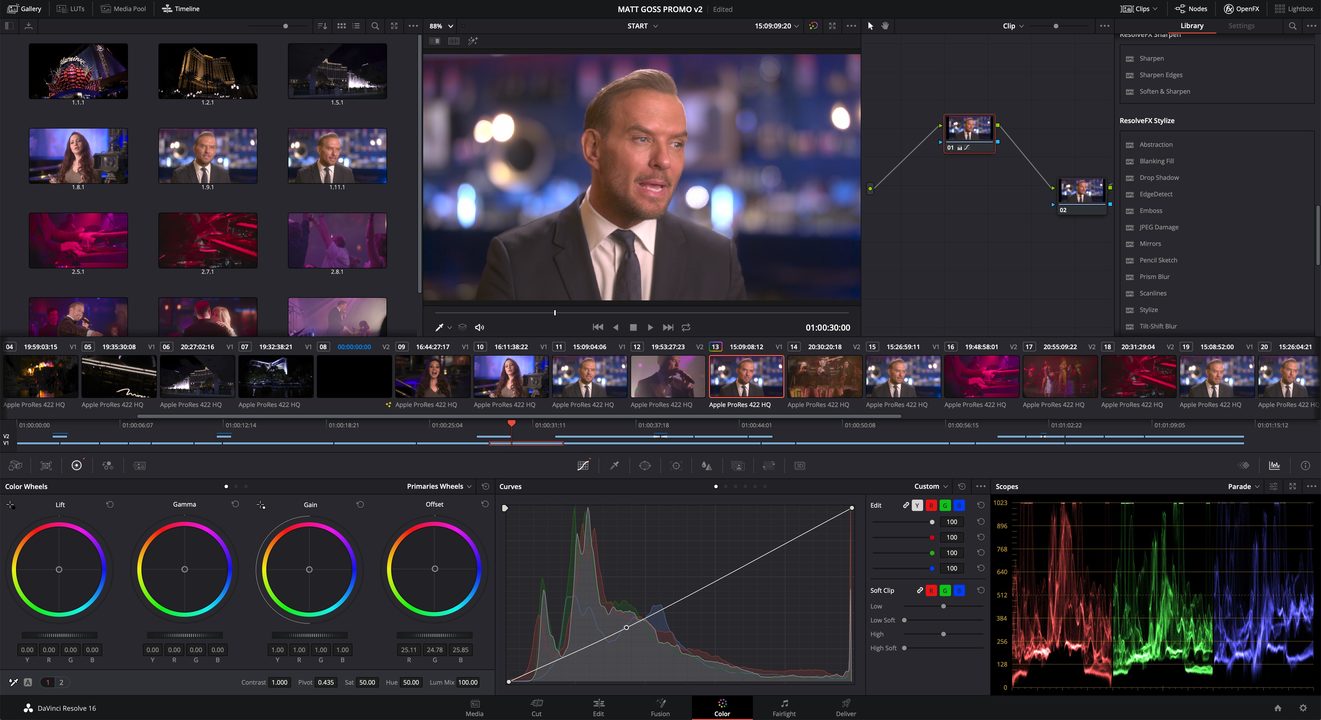
Davinci Resolve is free, but not open source. It’s a pro tool, used in Hollywood and by many video editing professionals. This was an important factor for me: I also wanted to learn some skills I could transfer to the real world if I ever decided to let go of the channel, or to focus on these skills as a day job. Davinci Resolve is temperamental on Linux, though. It seems it only works fine with Nvidia GPUs, and AMD ones if you install the pro driver. Intel cards are not supported at the moment, and even with the “right” GPU, you still can have issues.
Thankfully, I have an RTX 2060, so it ran like butter, with 0 issues. At least, that was before I started using it. You see, Davinci Resolve, as a pro tool, expects you to know a lot about the video editing process. I don’t. I learned by myself, using Kdenlive, and Pitivi, and I don’t have any formation on that matter. Resolve has a bunch of giant explanation PDFs going from the very basics to some more advanced stuff, but I didn’t want to sit through 500 pages of reading before I actually started using it, so I jumped straight in.
The interface is actually pretty friendly, well laid out, and not overwhelming. It took me a while to figure out that the “Cut” page was an editing page for quick edits and beginners, and the edit page was for more advanced ones. I decided to go with the “Edit” page, since I wanted to have all available options.
The keyboard shortcuts baffled me at first. Like, Control + Alt + L to ungroup an audio and a video clip. Backspace instead of Delete to remove a clip (pressing Delete deletes the whole zone of your timeline that the clip occupies, this created quite a few problems for me at first), this kind of stuff. It’s nothing that can’t be quickly learned, if you just look at the menus. Resolve can also use shortcuts from other editors, like Premiere of Final Cut, so it should be easier to use it if you’re coming from another tool.
Except before I got there, I came across a problem that proved quite annoying: for some licensing reasons, the free version of Resolve on Linux doesn’t handle h264 or mp3 audio. This means all my footage, and audio, had to be transcoded to even be imported in Resolve. No problem, I thought, a quick FFMPEG command will put all that to rest. Except the format Resolve handles is massive. Like extremely massive. From 35Mb 1080p60 clips saved in MP4/h264, it created monstrous 2Gb files. This meant that my project grew from about 200 Mb total to around 16Gb.
Honestly, this is a problem. I do have a lot of storage, but I don’t want to backup gigantic 20Gb+ projects. I just don’t want to waste that storage space, for no discernable benefits. So, after a few months of using Resolve, I decided to buy the Studio version. This also opened up a bunch of effects to polish the picture a little bit, which hides a lot of the rough edges from the videos I film using my smartphone.
I managed to cajole OBS into recording footage in formats that Resolve uses out of the box, and these files are huge: one Stellaris recording sessions uses between 120Gb to 200Gb, for the video only. The audio, recorded in WAV, is another 500Mb on top of that.

Once you actually manage to get your footage in the program, though, editing was pretty simple. You just use it as you would any other video editor, set in and out points, drag your clips to the timeline, add transitions, titles, and other stuff, and hit render.
I wanted to maintain editing quality between Kdenlive and Resolve, though, and that proved trickier. By default, Resolve has a few transitions, including shape based wipes, but there is no way that I could find to import your own shapes or images to use as wipes, as I could in Kdenlive. That meant using my own wipes was not an option. I tried to use Fusion to re-create them, but it was out of my reach if I wanted to finish up my video in time, so I decided to go for generic transitions, which didn’t turn out all that well in the end.
I now have a better grasp of Resolve, after creating a few mini-projects, and while I still didn’t find an easy way to recreate my own wipes, I think I have enough knowledge to make videos that look as good as the previous ones.
I did encounter a few issues with Resolve. The first one was audio export. By default, it seems Resolve doesn’t export all audio tracks, so my background music wasn’t audible in the video. I had to look for a solution online, and it took me quite a while. In the end, re-adding all audio tracks to the main audio bus did the trick, but the reason why this isn’t the default eludes me. I also forgot to set the project framerate to 60fps at the start, and you can’t change it once you started editing, so that first video is stuck at 24fps. “Not a mistake I’ll make twice”, I thought, before doing it 2 more times.
Performance-wise, Resolve was excellent. Previewing is super fast, the compositing happens on the fly and lets you see your video in real time, without hiccups, even with intensive transitions. The final render is also super fast, usually taking less time than the video length itself, which was rarely the case with Kdenlive.
In the end, I’ll stick with Resolve for now. I want to learn how to use Fusion to create my own titles and transitions, and I feel it offers a fair few more possibilities in this regard than Kdenlive does. The number of available resources out there is also huge, although most of them are paid-for, so it will be an investment I’ll have to weigh to see if it’s really worth it.
I’ll probably post a few more articles on the subject, so stay tuned if that could interest you!
Help support what I do
If you want to keep this website going, please consider subscribing on Patreon, you will get a bunch of cool advantages in the process, like a weekly podcast and the right to vote on video topics I cover on Youtube!


